The VPN connection enables you to access your machine as if you are on-site. The VPN connection between your computer and your device (StrideLinx router) can be seen as two separate VPN connections:
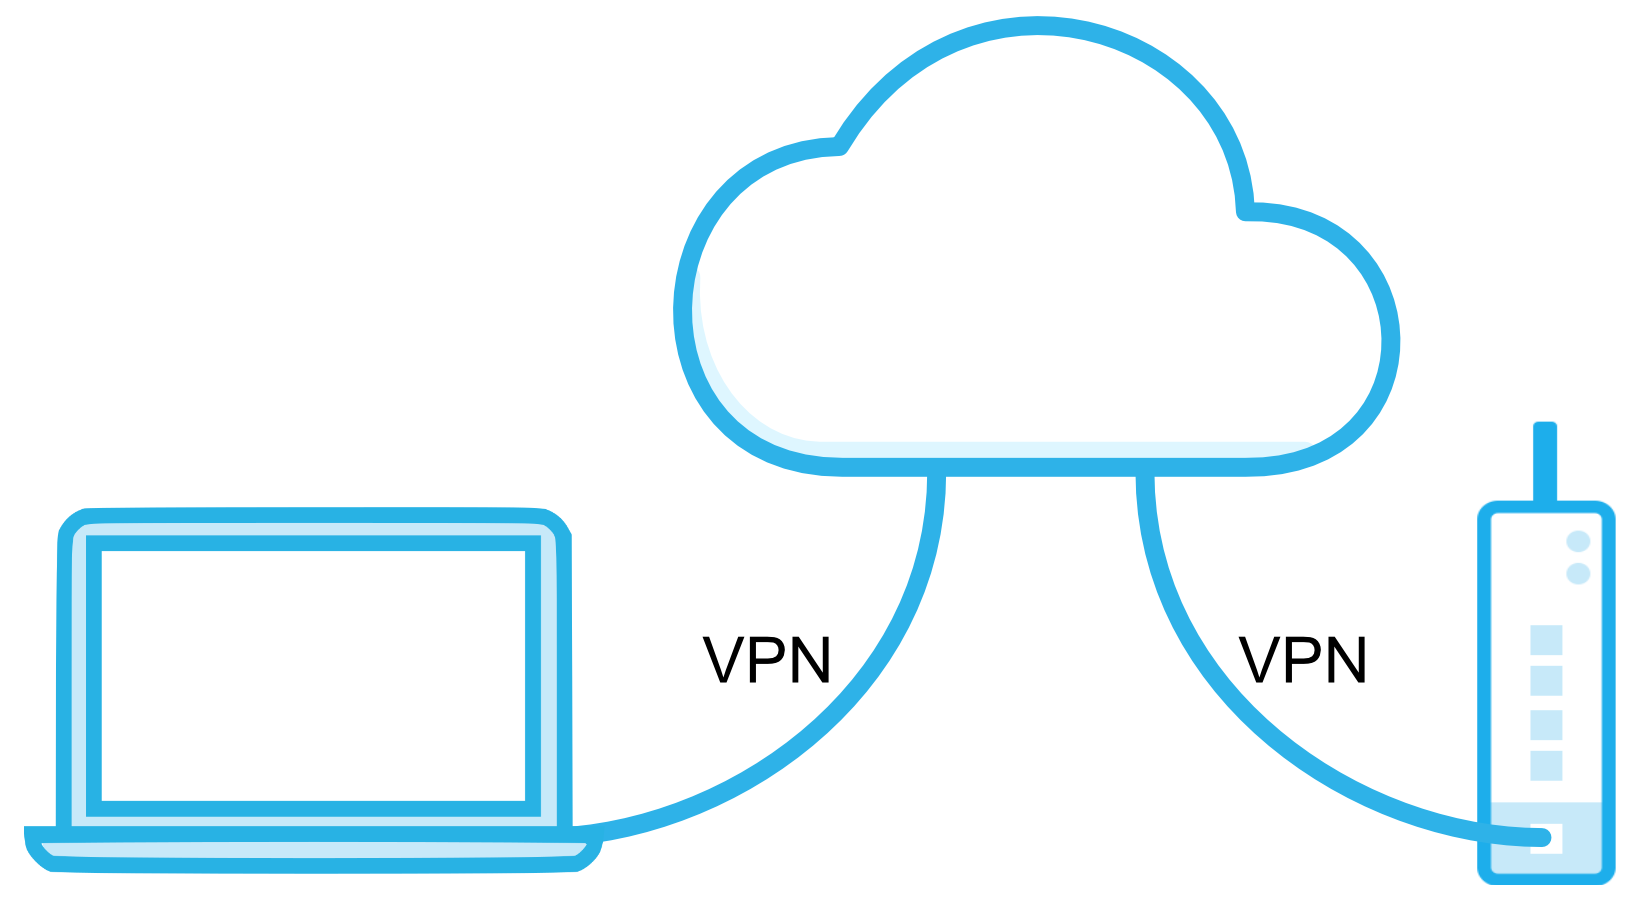
Your device's VPN connection (StrideLinx router to StrideLinx Cloud) is, by default, always enabled. However, you can disable it for moments you don't need it and then enable it again for moments you do need it.
You can toggle the VPN connection in two different ways:
- Remotely, using the StrideLinx Cloud
- Locally, using the StrideLinx router's digital input
- Locally, using the command line
Remotely, using the StrideLinx Cloud
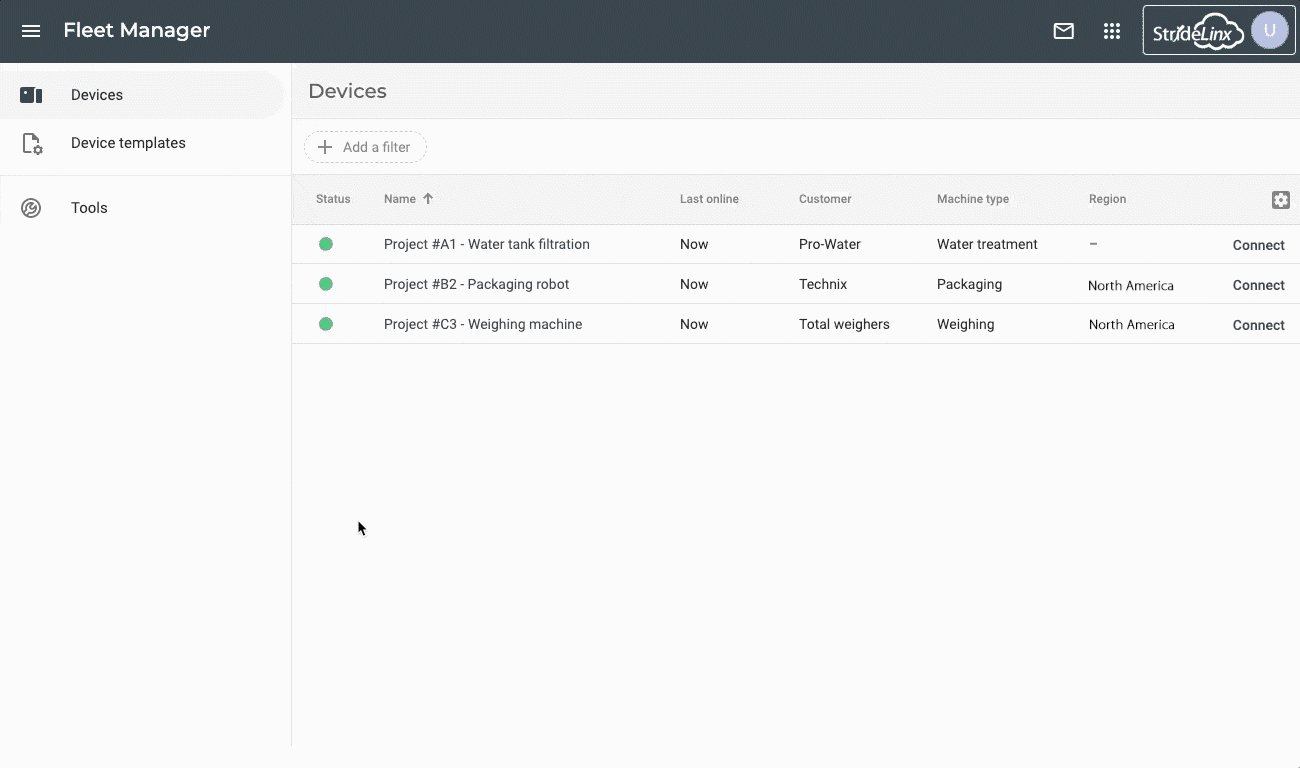
You can easily disable and enable a device's VPN connection using the StrideLinx Cloud.
Configuration connection
If the device's VPN connection is disabled, its lightweight Configuration connection will remain active. This enables you to remotely turn off the VPN connection and turn it back on again.- Go to the StrideLinx Cloud Fleet Manager app, which is accessible from the Apps menu
 in the top right corner if you are currently in a different StrideLinx Cloud app.
 - Open the main menu
 , go to Devices
  , and select the concerning device.
 - Expand the Network
 options and go to [VPN].
 - Toggle [Use VPN] in the VPN access section.
Locally, using the StrideLinx router's digital input
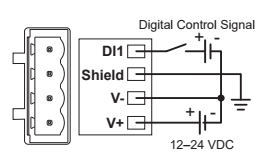
The end user may want to have local control over the VPN connection. This is possible using the StrideLinx router's digital input (DI). It enables you to locally disable/enable the VPN connection with the use of a switch (giving a high/low signal to the DI).
When the StrideLinx router's VPN connection is turned off locally, you are not able to turn it back on remotely. This can only be done locally.
Electrical details
The V- from the power supply is used as common ground.
| Type | Optocoupler |
|---|---|
| DI voltage range | 0-29 VDC |
| DI OFF state voltage range | 0-3 VDC |
| DI ON state voltage range | 7-29 VDC |
| DI ON state current range | 2-5 mA (typically) |
Configuration
The digital input can only be configured locally with the use of a configuration file and cannot be remotely changed through the StrideLinx Cloud.
If you have never created a configuration file before, make sure to first view one of our "Connect your StrideLinx router to the StrideLinx Cloud"-guides.
- Go to the StrideLinx Cloud Fleet Manager app, which is accessible from the Apps menu in the top right corner if you are currently in a different StrideLinx Cloud app.
- Open the main menu , go to Tools
 , and click [Start configuration] in the "Router config-file"-section.
 - Follow the steps and make sure you use the same settings as the StrideLinx router's current settings.
- At the "Internet"-step, expand the "Local control over remote accessibility"-option and select to disable the VPN connection when the digital input is either high or low.
- Continue following the steps and make sure you use the same settings as the StrideLinx router's current settings.
- At the last step, click [Download file] to download the generated file, called router.conf, and save the file to the root directory of a USB flash drive. You may exit the configuration tool by clicking the X in the upper left corner.
- Power on your StrideLinx router. Skip this step if the StrideLinx router was already powered on.
- Insert the USB flash drive into the StrideLinx router's USB port.
ACT LED status
The StrideLinx router's ACT LED should blink blue quickly shortly after inserting the USB flash drive, indicating that the StrideLinx router is configuring itself.
If this hasn't happened after 1 minute, please check that the file is located in the root directory of the USB flash drive and that the file name is exactly "router.conf". Try a different USB flash drive if the problem persists.
DI configured
The digital input on the StrideLinx router is now configured.