The StrideLinx router's WAN configuration determines how the StrideLinx router connects to the StrideLinx Cloud. Depending on your StrideLinx router model, you can configure it to connect via a wired, wireless, or cellular network.
You can also configure multiple connections (max. one of each type) which will then be used as fallback connections when the preferred connection is unavailable. More information: Configure fallback connections (failover).
Select what applies to you:
My StrideLinx router is currently offline
If the StrideLinx router is offline, you can make the changes in the StrideLinx Cloud, create a configuration file from those changes, and then apply the configuration using a USB flash drive. Advanced users can also use the local web interface to configure the StrideLinx router and once it is back online import the new configuration in the StrideLinx Cloud.
- Go to Fleet Manager > Devices and click on your device name.
- Go to Network > WAN.
- Under Internet, configure the new connection type.
- Enter the requested information (details below) and click Confirm.
Connection Details 
WiredLetting the StrideLinx router obtain an IP address automatically will be suitable for most situations. If you choose to enter a static IP address instead, be sure to always consult the local IT administrator for the correct network settings (IP address, network mask, default gateway, and DNS server).
The StrideLinx router's WAN IP range (company network, e.g. 192.168.100) needs to be different from its LAN IP range (machine network). More information can be found here.
WirelessEnter the name (SSID) of the wireless network with the correct capitalization ("guestwifi" is a different network than "GuestWiFi"). If it's password protected you'll also need enter the network's password. If you are unsure about the details, or the requirements mentioned below, please consult the local IT administrator.
Letting the StrideLinx router obtain an IP address automatically will be suitable for most situations. If you choose to enter a static IP address instead (requires firmware 3.22 or higher), be sure to always consult the local IT administrator for the correct network settings (IP address, network mask, default gateway, and DNS server).
The StrideLinx router can't connect to a Wi-Fi network if it requires you to log in to a webpage or accept their terms of use first.
The StrideLinx router can only connect to 2.4GHz networks and only if they are on channels 1 - 11.
Special characters can be used for the SSID. But it cannot end with a space.
The StrideLinx router's WAN IP range (company network, e.g. 192.168.100) needs to be different from its LAN IP range (machine network). More information can be found here.
The wireless network password is not stored in the StrideLinx Cloud. Therefore you have to send the changes directly to the StrideLinx router by pressing "confirm and push".
CellularEnter the provider's APN (Access Point Name) and MTU (leave default unless advised otherwise). and the SIM card's PIN code. Leave the PIN field empty only if there is no PIN set on the SIM card. If you are unsure about the details, or the requirements mentioned below, please consult the cellular provider.
Make sure the SIM card is activated and has data available.
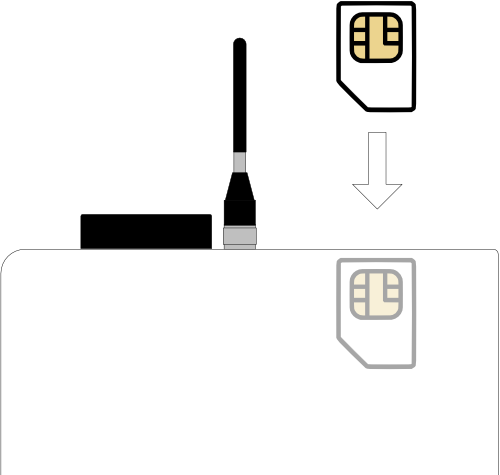
Insert the mini SIM card (2FF) before you power on the StrideLinx router.
The 4G/LTE models have 2 SMA connectors for your cellular antenna. The one closest to the power connector is the MAIN and the other connector is the DIV. Always connect an antenna to the MAIN. Connecting an antenna to the DIV is optional and never required. - You can choose to remove the old connection type (click Configure > Remove) or to leave it as a fallback connection (under Internet priority, drag
the old connection type to First fallback). More information: Configure fallback connections (failover).

You have now made the changes in the StrideLinx Cloud, but these are not yet active in your device. You will need to apply these changes to your device for them to take effect.
- Open the sync options
next to Push config to device and select See differences.
- Download
the configuration that is In the cloud and save the configuration file to the root directory of a USB flash drive.
- If the StrideLinx router is not already powered on, power it on.
- Insert the USB flash drive into the StrideLinx router's USB port. The StrideLinx router will take over the settings from the configuration file, indicated by a quickly blinking blue ACT LED.
- If the ACT LED has not blinked blue quickly after 1 min, confirm that the file is located in the root directory of the USB flash drive and that the file name is exactly "router.conf". Try a different USB flash drive if the problem persists.
After roughly 2 minutes, the StrideLinx router's ACT LED should be solid blue, indicating that it is online in the StrideLinx Cloud. Are you seeing a different LED status? View our troubleshooting article for information about each status: Troubleshooting - unable to connect your StrideLinx router to the StrideLinx Cloud.
My StrideLinx router is currently online
If the StrideLinx router is online, you can make the changes in the StrideLinx Cloud and push them to the StrideLinx router.
- Go to Fleet Manager > Devices and click on your device name.
- Go to Network > WAN.
- Under Internet, configure the new connection type.
- Enter the requested information (details below) and click Confirm.
Connection Details
WiredLetting the StrideLinx router obtain an IP address automatically will be suitable for most situations. If you choose to enter a static IP address instead, be sure to always consult the local IT administrator for the correct network settings (IP address, network mask, default gateway, and DNS server).
The StrideLinx router's WAN IP range (company network, e.g. 192.168.100) needs to be different from its LAN IP range (machine network). More information can be found here.
WirelessEnter the name (SSID) of the wireless network with the correct capitalization ("guestwifi" is a different network than "GuestWiFi"). If it's password protected you'll also need enter the network's password. If you are unsure about the details, or the requirements mentioned below, please consult the local IT administrator.
Letting the StrideLinx router obtain an IP address automatically will be suitable for most situations. If you choose to enter a static IP address instead, be sure to always consult the local IT administrator for the correct network settings (IP address, network mask, default gateway, and DNS server)..
The StrideLinx router can't connect to a Wi-Fi network if it requires you to log in to a webpage or accept their terms of use first.
The StrideLinx router can only connect to 2.4GHz networks and only if they are on channels 1 - 11.
Special characters can be used for the SSID. But it cannot end with a space.
The StrideLinx router's WAN IP range (company network, e.g. 192.168.100) needs to be different from its LAN IP range (machine network). More information can be found here.
The wireless network password is not stored in the StrideLinx Cloud. Therefore you have to send the changes directly to the StrideLinx router by pressing "confirm and push".
CellularEnter the provider's APN (Access Point Name) and MTU (leave default unless advised otherwise). and the SIM card's PIN code. Leave the PIN field empty only if there is no PIN set on the SIM card. If you are unsure about the details, or the requirements mentioned below, please consult the cellular provider.
Make sure the SIM card is activated and has data available.
Insert the mini SIM card (2FF) before you power on the StrideLinx router.
The 4G/LTE models have 2 SMA connectors for your cellular antenna. The one closest to the power connector is the MAIN and the other connector is the DIV. Always connect an antenna to the MAIN. Connecting an antenna to the DIV is optional and never required. - You can choose to remove the old connection type (click Configure > Remove) or to leave it as a fallback connection (under Internet priority, drag
You have now made the changes in the StrideLinx Cloud, but these are not yet active in your device. You will need to push your changes to your device for them to take effect.
Temporary disconnect
After this next step, the config push, the device may temporarily disconnect and LAN communication may be temporarily interrupted while it's applying the new settings. This only takes a moment.- Push the configuration to the device.